
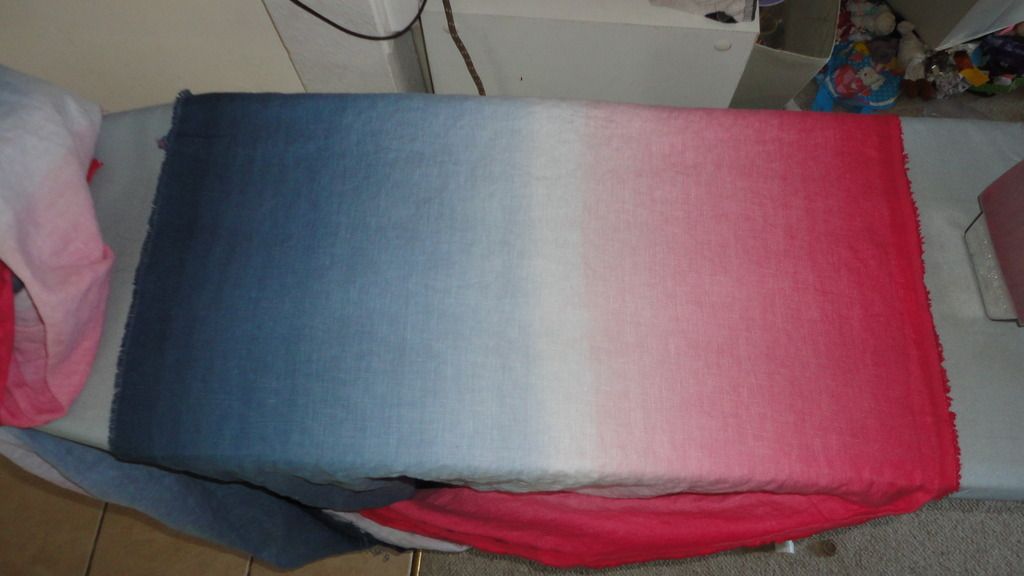
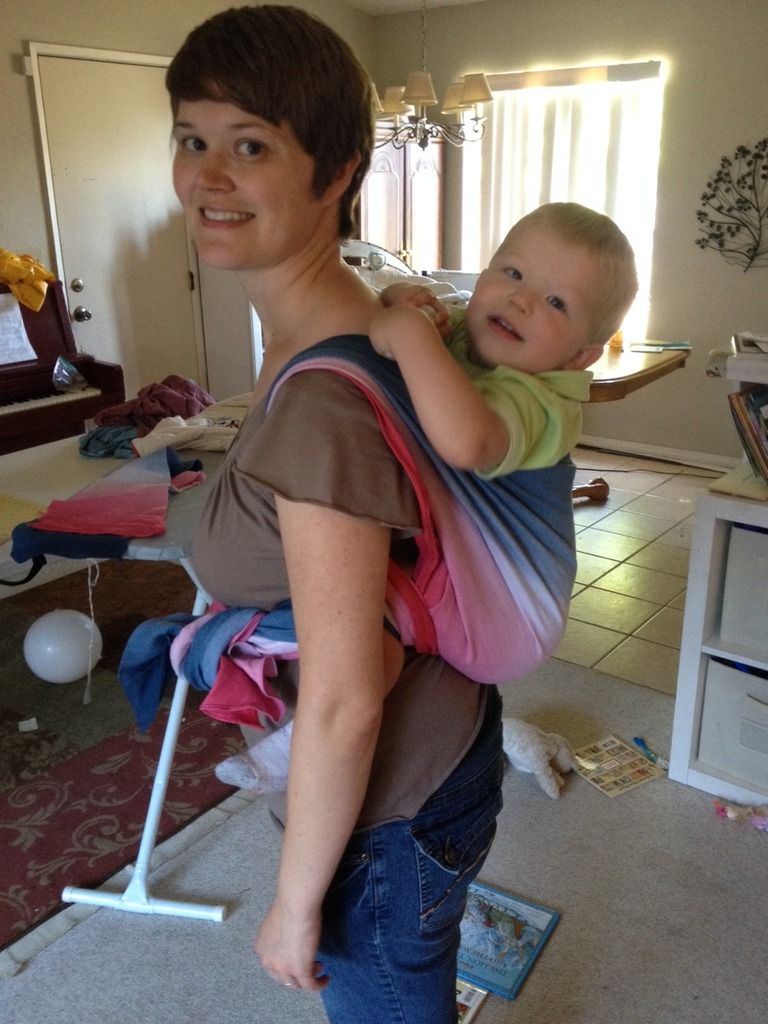
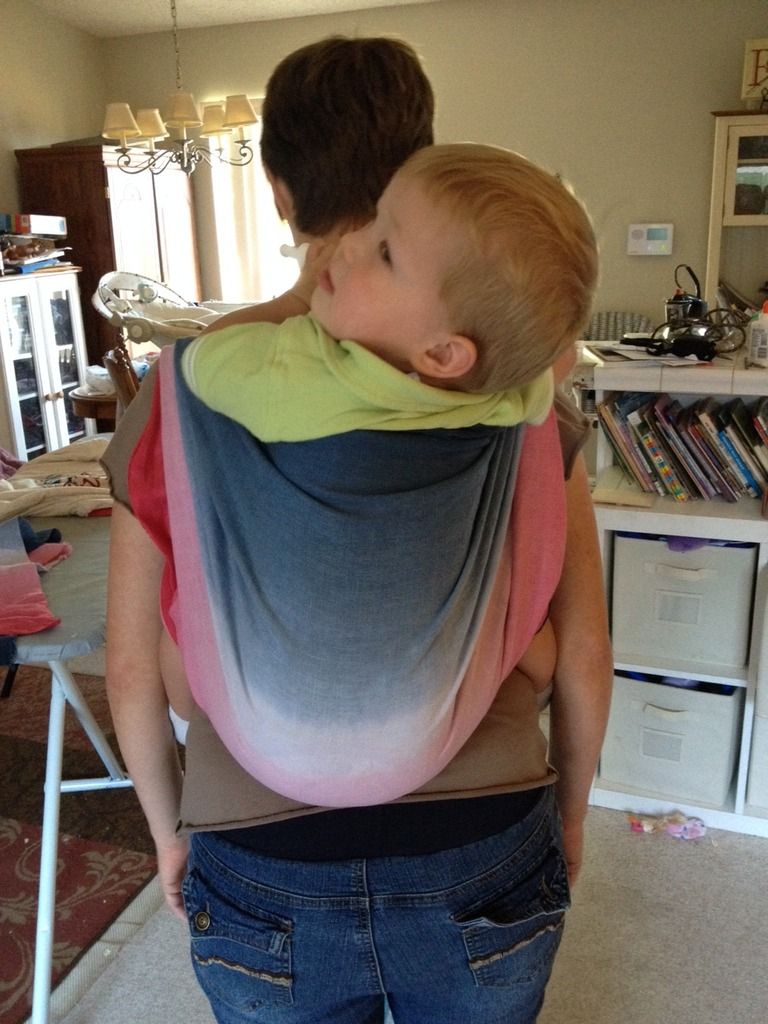
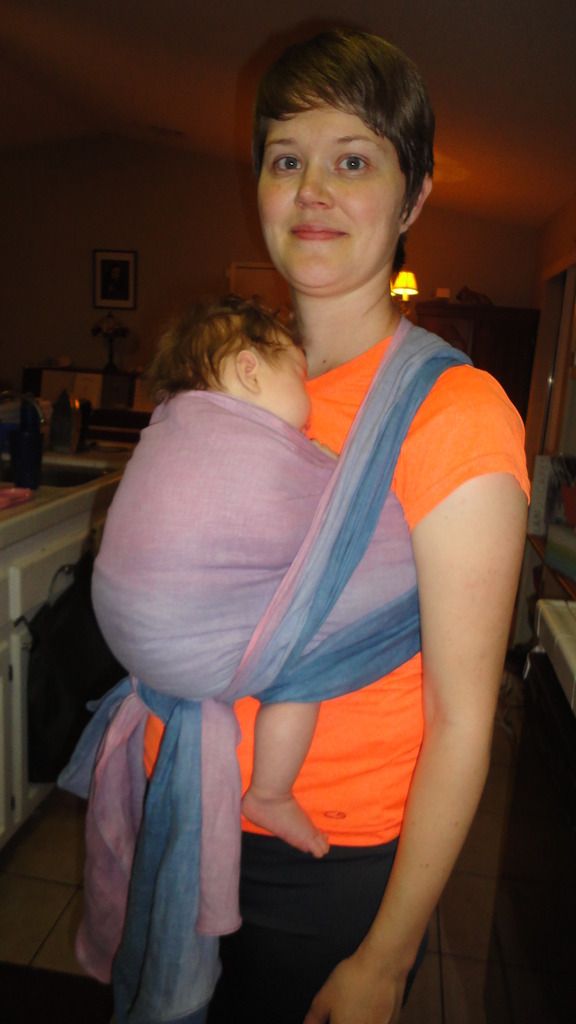
Craft time! Here's my first grad/ombré dye of a DIY woven wrap for babywearing. I love love love how it came out! It was a long process, but I feel that it paid off in the end with a pretty wrap.
I made this wrap out of 100% linen suiting fabric that I bought at JoAnn Fabrics. It's a nice weight and I think it will be great for summer.
Here's the process I went through for this dye job, hope you enjoy:
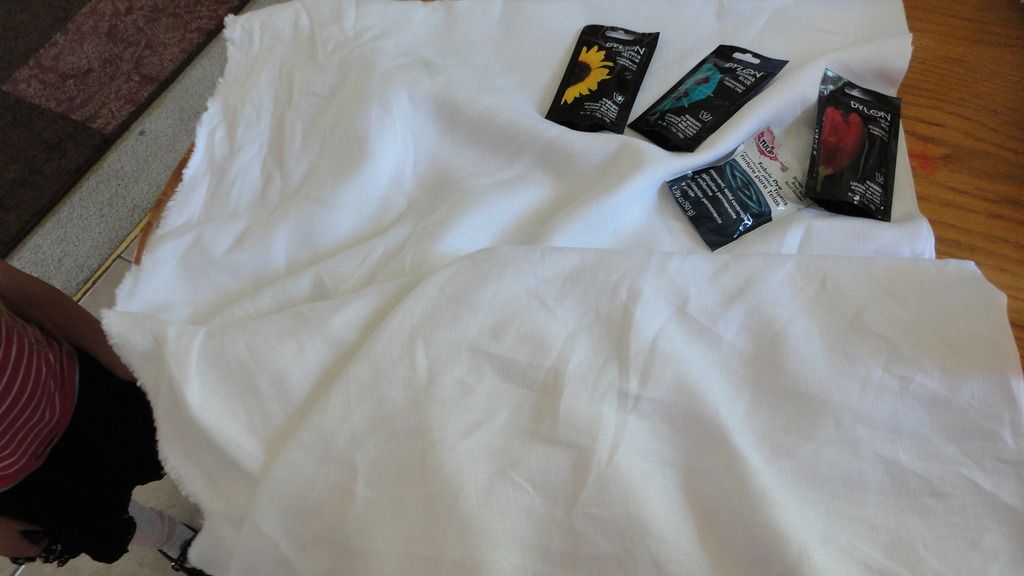
Here's what you need:
-Fabric (I used 100% linen, another popular choice is osnaburg, or a linen/cotton blend) the length depends on how long of a wrap you want. I bought 4 1/4 yards of fabric. The fabric was 53" wide, so I cut it down the middle length wise, and was able to get 2 wraps out of it. 4 1/4 yards ends up making about a size 4 wrap.
-Powdered dye- 2 packets of each color. I used Dylon, and Tulip, it needs to be fiber reactive so it will be safe for babies.
-Large pot that can hold all of the fabric (used for scouring and soaking the fabric)
-Rubber gloves to protect your hands
-Big tote for the dye tub
-Washing soda or soda ash (I used washing soda from wal-mart)
-Salt- a lot, I used about 10 pounds total, though how much you use is up to you
-1 Gallon container- a gallon jug would work, I used a gallon ice cream bucket, it made it easy for mixing everything in it.
-Blue Dawn dish soap
-Pant hangers with clips
-Tension rod
-Some big chunks of time (like 2-3 hours per color), lots of patience, and excitement! :)
Prep your fabric:
-Wash and dry your fabric (for shrinkage)
-Cut so that after hemming it will be between 25"-28" wide (or whatever width you want)
-Hemming...so you can hem it before you wash it, or before you dye it, or after you dye it. Totally up to you. Things to consider...if you hem it before you dye it the type of thread you use matters. To have the thread dye, it has to be cotton thread. Polyester thread won't dye. If you wait to hem it until after, you could end up with some fraying. I hemmed mine at the very end, and the linen didn't fray much at all, it was very easy to hem. That way I was able to match my thread to my dyed fabric, and use polyester thread which is stronger.
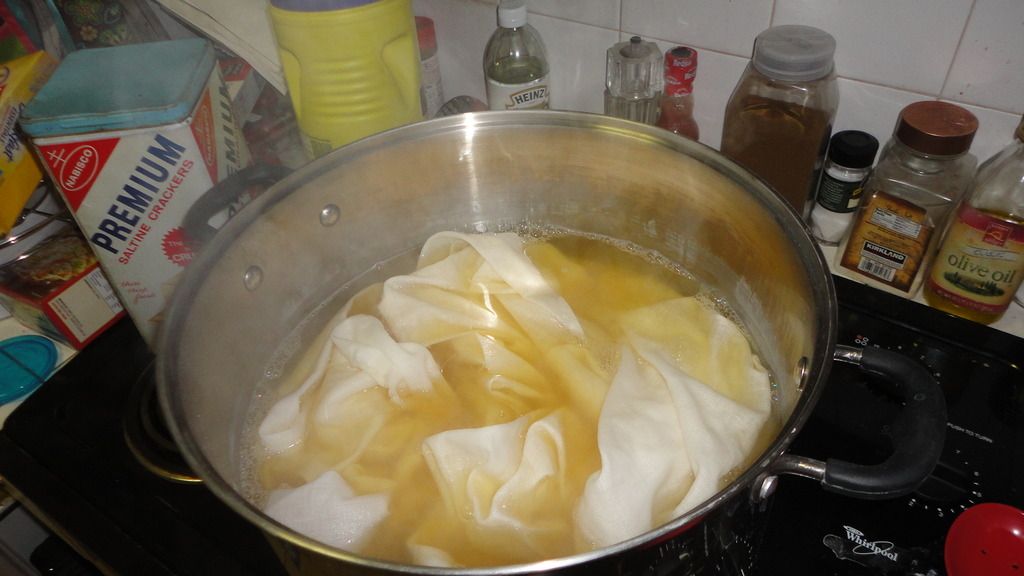
-Scour your fabric- fill a large pot with water and 1 cup of washing soda and 1 tablespoon of Blue Dawn, bring to a boil. Add you fabric, and boil for 30 minutes stirring occasionally. My water turned a dark yellow color (which totally made me wonder what was on that fabric, and glad I had scoured it to get the fabric clean) Rinse and wring out (I threw it in my washing machine and did a rinse and spin cycle).
-Soak- refill your pot with warm water and a cup of washing soda. Add your fabric, and let it soak for 30 minutes. Drain the water, (I actually saved this water and used it later adding it in with my water to the dye bath, saved water and washing soda) do NOT rinse the fabric (you want the washing soda to stay in the fabric, it will help with the dyeing), wring out and leave the fabric damp.
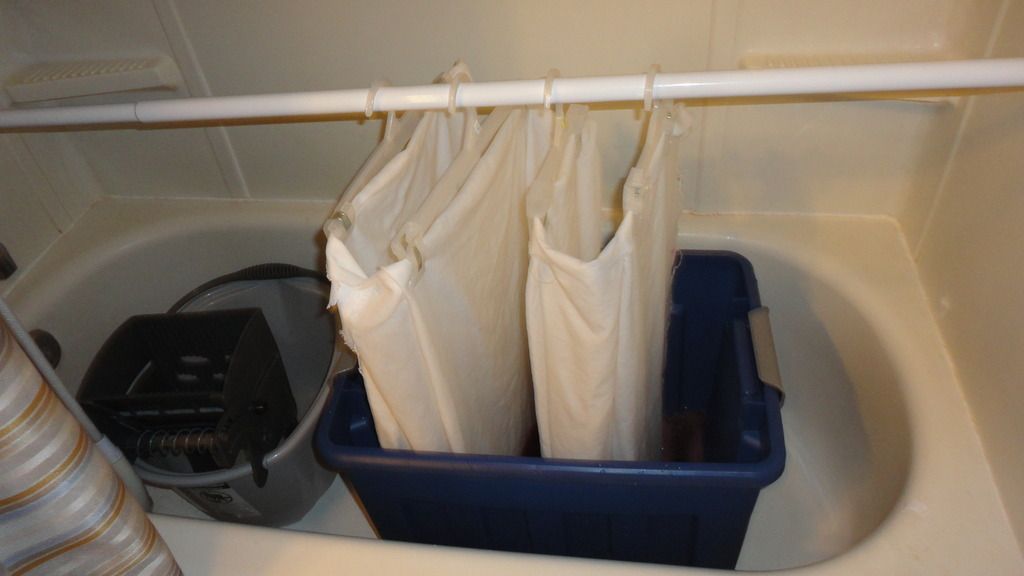
Setup:
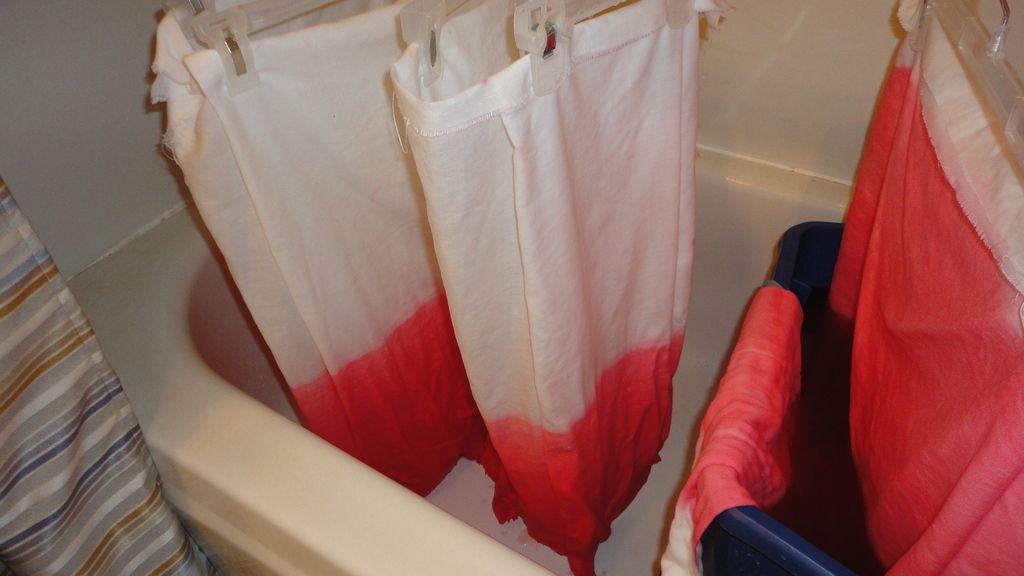
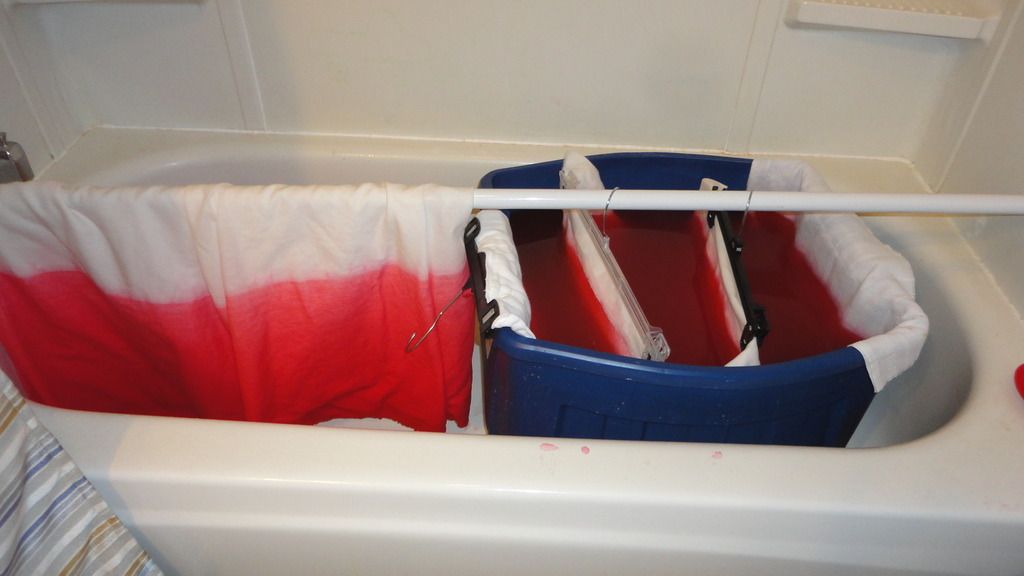
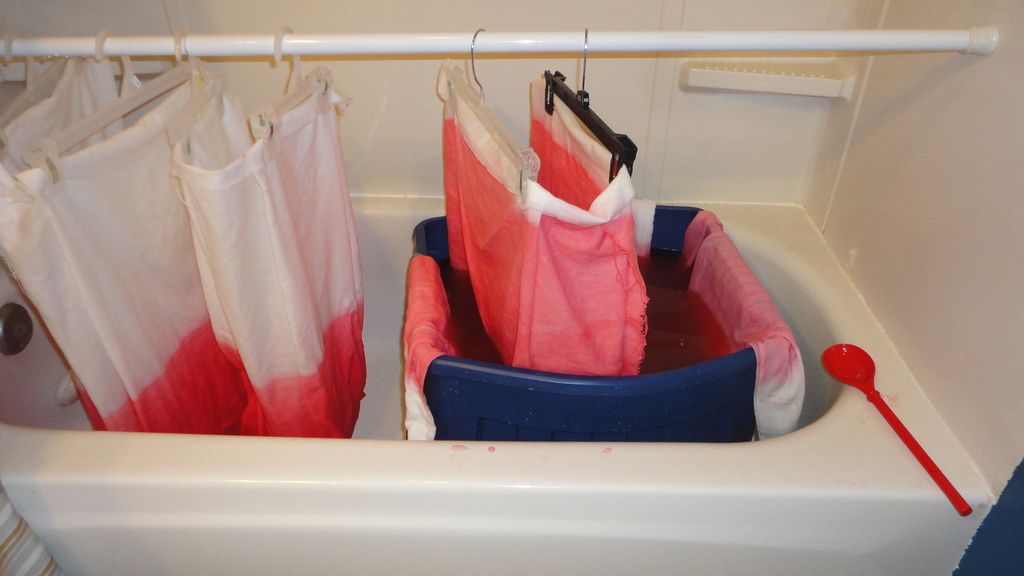
-Put your tote in the bathtub with the tension rod above it. The tension rod should be at the height where when the fabric is hung on it, and put into the tub, it hangs close to the bottom of the tote, but does not touch the bottom.
-Accordion fold your fabric and attach it to the hangers (you kind of have to mess with this and decide what works, but you want to spread the fabric out, so don't attach too much fabric to each hanger).
Dyeing the fabric:
-Add some warm/hot water to fill the bottom of the tote a couple inches, add 1/4 cup washing soda and 1 cup salt and mix.
-In a small container, mix dyes as directed on the packages, then add to the tote, and mix. (Try not to let it splash on the sides of the tote).
-Add a little bit of blue dawn (probably a tablespoon) to break the surface tension.
-Hang the fabric on the rod over the tote, so that the bottom of the fabric is in the dye (but not touching the bottom of the tote)
-Let the fabric sit for 5-10 minutes.
-While you wait fill up you gallon container with warm/hot water and mix in salt and washing soda (up to you how much, I used between 1/2 to 1 cup salt and 1 tablespoon washing soda for each gallon of water).
-After it has sat for 5-10 minutes, add the gallon water, salt, washing soda mixture (be careful not to let it splash on the fabric while you are adding it. I poured it down the corner wall of the tote)
-Set your timer for 5 minutes.
-Continue to add a gallon of warm water mixed with salt and washing soda every 5 minutes until you reach the middle (or the height you want to stop at).
-After adding the last water mixture, let it sit for 5 to 10 minutes, then take it out of the dye.
-Hang it to blanch for 30 minutes or more. (Which mean just let it hang for 30 minutes+)
-Rinse the fabric in cold water until the water runs clear. This takes a long time, and lots of rinsing. If you will be doing another color on the other side, try not to rinse that side because you want to keep the washing soda in it. Or just do another washing soda soak on that side before you dye it.
-Flip the fabric, and repeat the above dyeing steps on the other side of the wrap.
-When the wrap is done dyeing, and if fully rinsed, wash it on warm/hot and let it dry. (I washed it in my washing machine and dried it in my dryer.)
-Step back and checkout the amazing wrap dye you just did!!!
-Hem if you haven't done so, then take it for a spin with you little one.
Extra Idea for left over fabric and dye:
So after I finished dyeing this wrap, I had a full tote of dye water just sitting there, so I decided to make use of it. I took my extra fabric and did a grad dye, but in the revers order. I submerged all of the wrap, then slowly pulled it out (moved the tension rod higher, not an easy feat) every 5-10 minutes. I was not as dedicated to this one, so I wasn't very diligent with my time, so it's pretty chunky,but ended up with a fun grad dye anyways.

I also dyed some burp rags, and some fabric for a skirt for my daughter (might as well make good use of the dye when you have it.)
Update
Here's another tutorial for a Sunset 3 color grad dye: http://peacefulcreativeliving.blogspot.com/2015/07/diy-sunset-grad-dye-on-woven-wrap.html

Fabulous job, mama! I have been tub dyeing wraps for almost 5 years now, and I am finally ready to try my first grad. Slow learner. ;) This tute is super helpful. Thanks for posting.
ReplyDeleteThanks so much! Here's another grad dye tutorial I just did with a different method: http://peacefulcreativeliving.blogspot.com/2015/07/diy-sunset-grad-dye-on-woven-wrap.html
Delete